- GM
- FORD / MERCURY
- MOPAR / JEEP
- VOLKSWAGEN
- VSW STEERING WHEELS
- Instructions
Our Convertible Top Program Features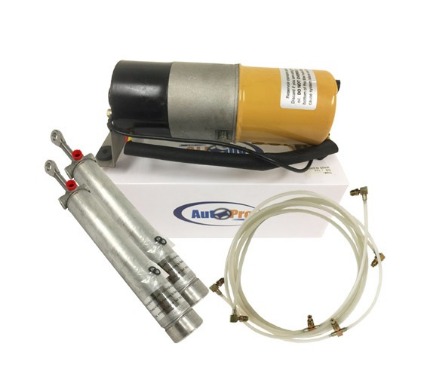
1 Year Warranty This Five Year Manufacturer's Warranty Cover all Cylinder, Motors and Hoses. No Core RequiredEvery part we offer is brand new and is designed like the original. Ready to installWhether you own a Chevy, Ford or Mopar we have what you need. Check out all our categories on top of the page to find your vehicle. All our products has been manufactured to original factory specifications by Auto Pro USA. These replacement functions just as good, if not better than the original part. The fit, finish and function of this piece will work perfectly for your restoration or repair. 
From the 1950's to the 1970's we offer a variety of convertible top components for GM. Whether you have a Chevy, Buick, Pontiac or Caddy, we have what you need. Click on the photo and see everything that's available for your restoration project. 
Auto Pro USA not only can get your Mustangs convertible top cylinders replaced with a quality product, we also have parts for the more rare vehicles including Falcon, Fairlane & Cougar just to name a few. Click on the photo for all available convertible parts. 
Mopar parts are hard to come by so Auto Pro USA made it a mission to supply convertible top components for 1963 to 1971 for A/B/E body categories. Click on the photo to see all of our available Mopar convertible top parts. Convertible Top Hydraulic Bleeding Instructions "We recommend using Automatic Transmission Fluid in all convertible top systems 1953-2008" 1. Disconnect the convertible top cylinders from the convertible top frame by removing the bolt/pin in the end of the cylinder rod. 2. Remove fill plug from the end of the reservoir can. Most cars before 1963 use a large slotted screw, my most cars in 1963 and later use a rubber plug. The fill hole must remain open for the entire bleeding procedure. Placed a rag below the fill hole to soak up residual fluid that may run out during the bleeding process. 3. Fill your reservoir can 3/4 full, or to the bottom of the fill hole while the motor pump is level. 4. Using the convertible top switch, operate the motor pump to extend the convertible top cylinders, adding fluid as necessary to complete a full revolution out and in it. Top cylinders will always move in and out at uneven rate when operated without a load. 5. Once you have completed a full revolution out and in, with the top cylinders retracted, fill the reservoir can to 3/4 full and then complete another revolution. 6. Repeat step five until the fluid level in the reservoir can is 3/4 full, or to the bottom of the fill hole, at the end of the revolution. 7. Reconnect the convertible top cylinders to the convertible top frame and insert the reservoir plug to complete the procedure. NOTE: We highly suggest professional install only. 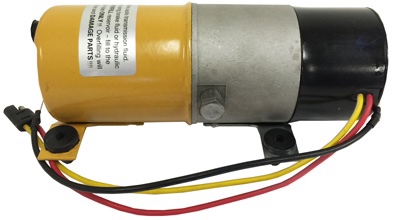
|


© Copyright 2016, AutoProUSA.com. All Rights Reserved.
Online store by Volusion.